Kids Arts and Crafts Storage
Not knowing ways for storing your kids’ artwork can be tricky. Those pictures will always hold a special place in your heart but it can cause a lot of clutter when you run out of places to put them.
You don’t want to throw them away but you don’t know what to do with all of those pictures and art projects. And as much as you try they are just taking up space.
I totally understand. There just isn’t enough space on the fridge to keep it all as much as I would love too. So I have 5 different ways to help you store your kiddos art without throwing it away!
*This article may contain affiliate links.
This means I sometimes earn a commission, at no extra cost to you, if you make a purchase using my link.
Further info can be found in the disclaimer.

5 ways for storing your kids’ artwork (without throwing it away)
Get a file box
A file box with hanging files can be used for more things than just moving your stuff out when you get fired. You can store your kids’ artwork easily in one of these. Plus they can keep you very organized because they stack so nicely!
I would suggest getting a box for each one of your kids because they fill up pretty fast. Kids love to make things for their mom so if you don’t have one for each of your kiddos you’ll be running to the store to get more.
You’ll be able to look through things and have the actual craft/art there. You can even use it to recreate it if you want.
Plus when they get older everything will be in one spot so you’ll be able to show off their art skills (and embarrass them) to their future spouse. And they can take it with them (if you want them too) when they move out.
Take a picture of it
You can take a picture of what your kid made and put it in a photo album. You can still see what it without all of the bulk it takes to store it. Plus you won’t have to worry about the colors fading with time. They will look exactly as they did when your little one created it.
There are great photo programs that you can upload things too and have it sent to you, so there is no worry about organizing a photo album. Make sure you label the picture so you know how old they were when they drew it.
You can use shutterfly, chatbooks, or snapfish. They are all good options. You just upload your pictures and they will send it straight to your door (which you probably already know).
But if you don’t want to order a book you can print them out yourself and put them in a photo album. This can be a fun project to do with your kids.
3 ring binder
If you don’t want to have to worry about taking a picture of the artwork or if you just don’t have any room for one for one more box you can put them in a 3 ring binder!
The nice thing about 3 ring binders is the price tag! They are so cheap, you can even find them at the dollar store sometimes. And they will fit nicely in a bookcase so you don’t have to worry about finding that much space for them.
You can either punch holes in the picture itself or put them in a clear protective sheet. That way your kids will be able to look through the binder and see all of their crafts they have done and you don’t have them taking up space on your counter.
It’s also nice because you won’t have to worry about them getting tangled or ripped when they are being looked through.
Put it on an external hard drive
This hack saves the most space when it comes to storing your kids’ artwork. It can be as small as a USB drive.
Most printers nowadays have a scanner on them. So you won’t need to go get anything, you’ll have everything you need at home! (and if you really do need something Amazon is just a click away!)
And since it is external you don’t have to worry about losing all of the pictures if your computer crashes.
You can do this and print it in a book, that way your kid can never get mad at you for losing their picture. You’ll have it in 2 different places.
Make a collage

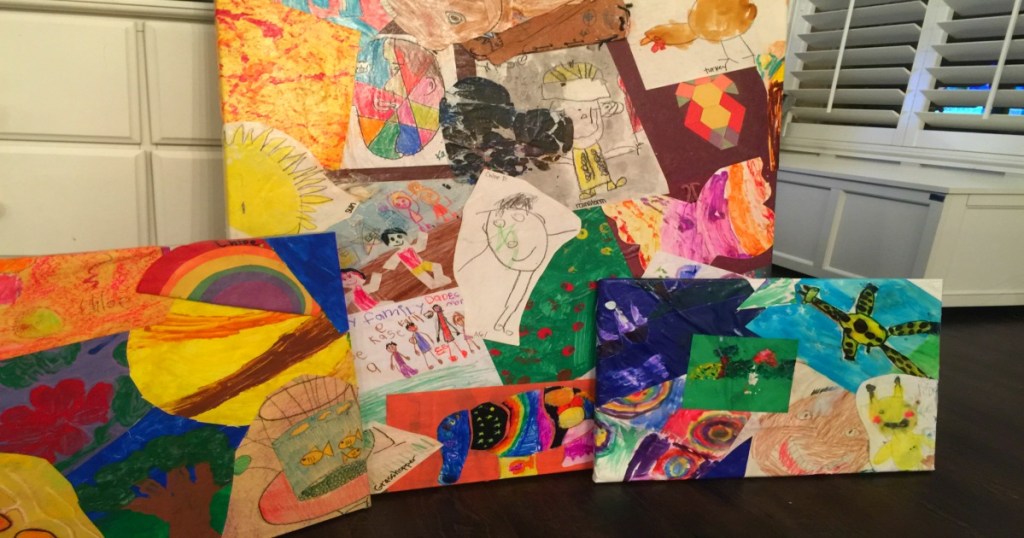
This great idea came from Hip 2 Save. They made a collage on canvas of all their kids’ artwork.
All you’re going to need is modge podge and a canvas. You cut out pieces of art and put them on the canvas how you (and your kids) like it. When you have the layout done you modge podge the back and front. Once it’s dry it will make a great piece to any room!
Voila! Your kids’ will be so proud to show off the new wall display and your kitchen table will no longer be littered with excessive amounts of artwork.
I hope you found a solution on storing your kids’ artwork. Let me know in the comments if you tried one or if there is a way you store them all at home!

DON’T FORGET TO PIN AND SHARE


